Campsite Waste Sorting Kit
A practical step-by-step guide to campsite waste sorting kit, including preparation, instructions, common issues, tips, and next steps.
Campsite Waste Sorting Kit
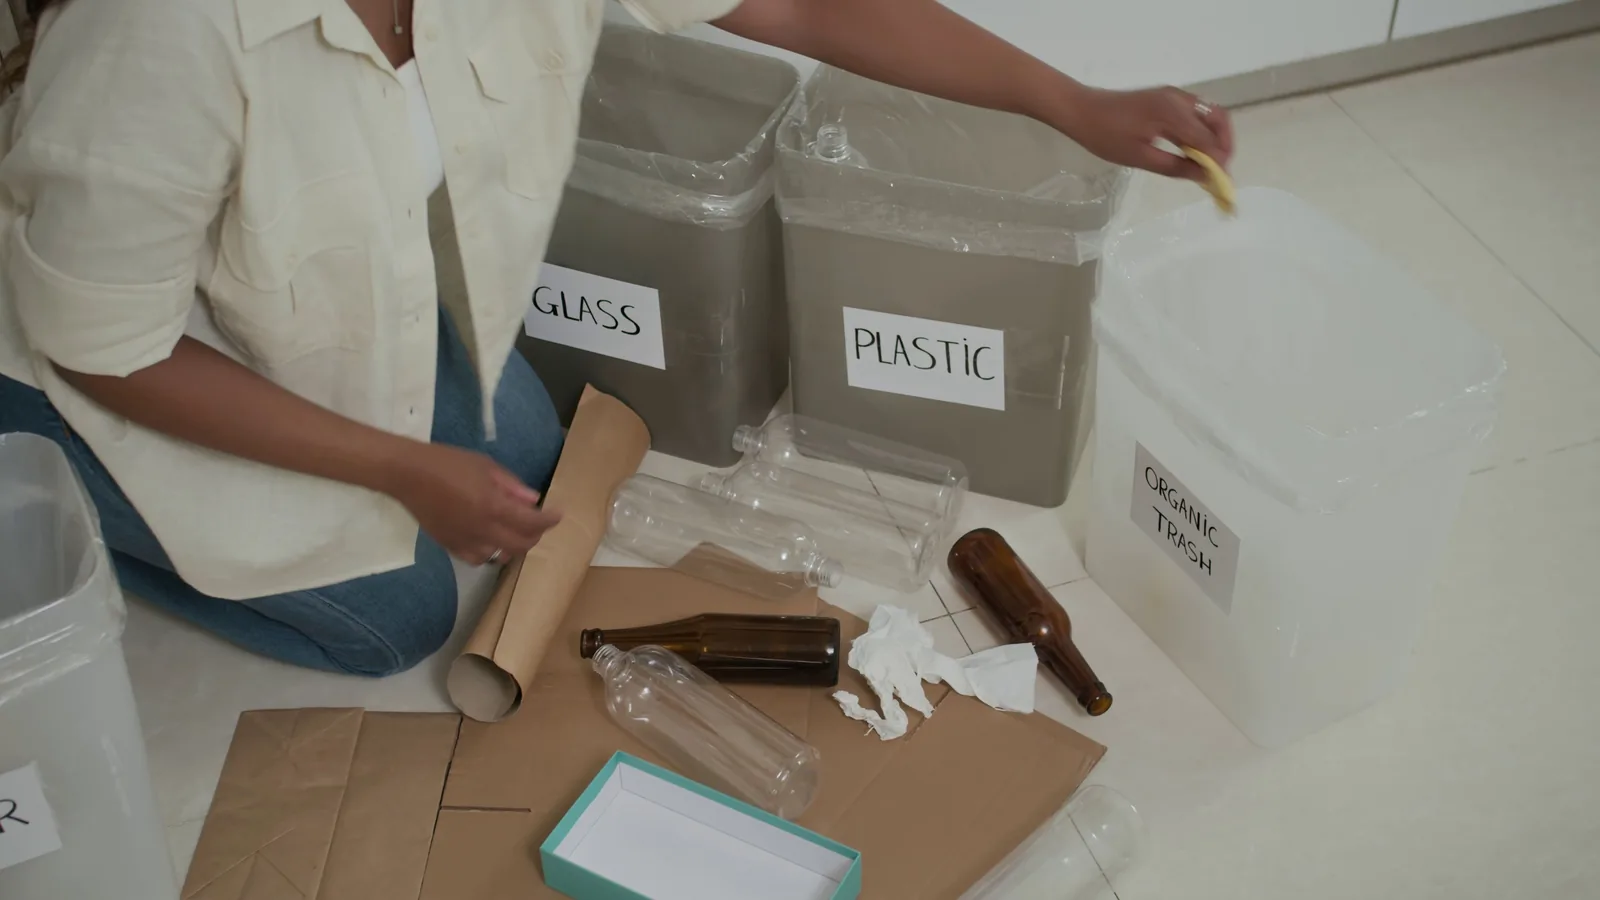
A campsite waste sorting kit is a small, organized set of containers, labels, and tools that lets you separate trash, recycling, and food scraps at your pitch instead of guessing at the bins near the exit. Building one takes a few minutes, but it prevents messy mix-ups, keeps wildlife away from loose food, and makes your final cleanup faster when you pack up. This guide walks you through choosing containers, labeling them clearly, setting up a simple station, sorting each item correctly, and managing the kit through rain, wind, and short trips.
Fast Answer
- Use three labeled containers for trash, recycling, and food scraps, plus a small bag for items you must carry home.
- Rinse or scrape food residue before placing items in recycling, and keep all containers closed when you are away from the pitch.
Before You Start
- Choose three sturdy containers with lids: one for trash, one for recycling, and one for food scraps or compostable waste.
- Pack a roll of clear labels or a marker and tape so you can mark each container with words and simple pictures.
- Bring a small separate bag or bin for items that cannot go in the campsite bins, such as batteries, glass, or greasy wrappers.
- Check the campsite rules before you arrive so you know which materials the site collects and which ones you must carry home.
Step-by-Step Instructions
Pick containers that match your trip length
Start by matching your containers to how long you will stay and how many people you are feeding. For a weekend with two people, three small lidded bins or heavy bags are enough. For a longer stay or a larger group, use a stackable crate system so each material has its own space without crowding your pitch. Choose containers with handles and lids, because open bins tip over in wind and invite animals. A practical check is to fill each container about one third full with clean, dry items before you leave home, then lift it by the handle. If the handle digs into your hand or the lid pops open, the container is too flimsy or too small for your trip. Testing at home matters because a container that fails at the campsite leaves you sorting loose waste by hand in bad weather.
Label every container before you pack
Before packing, label each container with a large word and a simple drawing so anyone at the pitch can sort correctly without asking. Write the material name on the lid and on the side that faces the walkway, using clear block letters. Add a short list of examples under each label, such as paper, cans, and plastic bottles for recycling, or food scraps and napkins for the food waste bin. Use tape that sticks to plastic and metal, since plain paper labels peel off when damp. A practical check is to hand each container to a person who did not pack the kit and ask them to point to the right bin for a bottle, a greasy wrapper, and an apple core. If they hesitate, your labels need bigger words or clearer pictures. Clear labels reduce mistakes when several people use the station in a hurry.
Set up one central sorting station
Place all three containers together in one spot near your cooking and eating area, but not directly against your tent wall or sleeping space. A single station keeps waste in one zone, which makes the final cleanup faster and keeps smells away from where you sleep. Set the containers on a flat, stable surface such as a crate lid or a small folding table, and face the labels toward the path people use most. Keep the station downwind of your seating area when possible, because airflow carries odors away from where you relax. A practical check is to walk your normal route from the cooking area to the station while carrying a plate and a cup. If you must step over guy lines or reach past the fire, move the station. Easy access means people actually use it instead of dropping items in the wrong bin.
Sort each item as you finish using it
Sort items the moment you finish with them instead of piling everything on a table for later. Scrape food residue into the food waste container, then rinse or wipe containers that will go into recycling. Place clean paper, cans, and bottles in the recycling bin, and put greasy wrappers, wet paper, and mixed-material packaging in the trash. Items you must carry home, such as batteries or broken glass, go into the separate bag right away so they do not get lost in the general trash. A practical check is to look into each container at the end of each meal. If recycling contains food smears or liquids, empty it, wipe the items, and move the wet items to trash, because food residue can ruin a whole batch of recycling at the collection point and create smells that attract animals.
Manage the station through weather and wildlife
Weather and animals are the two forces that undo a good sorting setup, so plan for both before problems start. When rain is likely, move the station under a tarp or into a vestibule area where containers stay dry and lids stay closed. Weight the lids with a small stone or strap if wind is strong, and never leave food waste open overnight. At night, close every lid and move food waste into a vehicle, a hard-sided storage box, or a secure locker if the site provides one. A practical check is to walk the pitch after dark with a light and look for loose wrappers, open lids, or food smells near the sleeping area. Fixing those small issues at night prevents a large, messy cleanup in the morning and keeps local wildlife from returning to your pitch.
Empty and clean the kit before you leave
On your final morning, empty each container into the correct campsite bin or pack the materials into your vehicle for the trip home. Check the site rules for where recycling and food waste go, because some places collect them at a central point and others expect you to carry them out. Rinse or wipe each container, let it dry fully, and nest the smaller pieces inside the largest one to save space. A practical check is to shake each bag and look inside before you seal it. If you find mixed materials, pull them apart now, because a bag that leaves your hands mixed may be thrown away as trash at the collection point and undo your sorting work. A clean, organized kit also means your next trip starts without scrubbing dried food from lids and corners.
Quick Reference
| Situation | Action | Why it helps |
|---|---|---|
| You are cooking and a greasy wrapper and a clean can are in your hand at the same time. | Tear or fold the wrapper into the trash container, then place the clean can in the recycling container and check both lids are closed before you sit down to eat. | Grease ruins paper and cardboard recycling, so separating the two items immediately keeps the recycling batch clean and prevents smells near the cooking area. |
| Rain starts while your sorting station is open and food scraps are inside it. | Close every lid, move the station under a tarp or into a sheltered spot, and empty the food waste container into its secure storage before the rain gets heavy. | Water turns food scraps into a smelly slurry that leaks from bags, and wet paper or cardboard cannot be recycled, so quick action protects both your kit and the site. |
| You cannot find a bin for glass, batteries, or mixed packaging at the campsite. | Place those items in your separate carry-home bag, seal it, store it closed with your gear, and check the site rules or ask staff where they belong. | Many campsites do not collect every material, and leaving those items in the general trash or on the ground can harm wildlife or break site rules, so carrying them home is the safer choice. |
Common Issues
- Recycling smells bad after one day at the pitch.: Empty the container, move wet or greasy items to the trash, rinse the remaining containers and cans, and line the bin with a fresh clear bag. Add a dry layer such as newspaper at the bottom to soak up small drips, and keep the lid closed whenever you are not adding an item.
- Wind keeps knocking over the containers and scattering loose waste.: Set the containers in a low crate or box, put a stone or strap on each lid, and place the station behind a windbreak such as a vehicle, a cooler, or a folded tarp. Pick up any escaped wrappers right away so animals do not follow the scent back to your pitch.
- People at the pitch keep putting items in the wrong containers.: Make the labels bigger and add pictures, then give a short reminder at the first meal. Put a small sample item taped to the outside of each container, such as a clean can on the recycling bin, so the correct choice is obvious even to someone who has not read the labels.
Advanced Tips
- Use a three-bag hanging organizer on a single hook to create a compact vertical station that takes up almost no ground space.
- Keep a small laminated card in the kit that lists the site's collection rules and the nearest drop-off point so anyone can check quickly.
- Weigh or count your bags at the end of the trip and note what filled up fastest, then adjust container sizes for your next outing.
Final Checklist
- Three labeled containers with lids are set up together in one stable spot away from the tent.
- A separate sealed bag holds batteries, glass, and other items you must carry home.
- Food waste is closed and stored securely overnight and whenever you leave the pitch.
- Every container is emptied, rinsed, dried, and nested for storage before you drive away.
FAQ
How many containers do I really need for a short trip?
Three containers cover most trips: one for trash, one for recycling, and one for food scraps. Add a small sealed bag for items the campsite does not collect. If you are camping alone for one night, two containers plus the carry-home bag may be enough, but check the site rules first so you know what the bins there accept.
What should I do if the campsite has only one general waste bin?
Keep sorting anyway and carry the recycling and food scraps home with you. Rinse containers so they do not smell, seal them in bags, and store them with your gear, not inside the sleeping area. Before you leave, ask staff or read the posted rules to confirm whether any central drop-off point exists nearby.
How do I keep animals out of the sorting station?
Keep every lid closed, store food waste in a hard-sided container or vehicle overnight, and never leave scraps on the ground or in an open bag. Set the station away from your tent and clean up spills right away. If the site provides a secure storage locker, use it, because local wildlife learns quickly where food is left out.